
Overview of ATF
Automated Test Framework (ATF) in ServiceNow
The Automated Test Framework (ATF) is a built-in ServiceNow tool designed to automate testing of your instance configurations, customizations, and applications. It allows you to create and execute automated tests that verify your ServiceNow instance continues to function correctly after changes, such as upgrades, new developments, or update sets.
Why Do We Need ATF?
In real-world ServiceNow projects, teams often customize core processes, including:
- Incidents
- Problems
- Catalog Items
- Flows
- Business Rules
After platform upgrades or configuration changes, these customizations can sometimes break unexpectedly.
ATF addresses these challenges by:
- Reducing the need for repetitive manual testing
- Detecting issues early in the development cycle
- Saving significant time and resources
- Ensuring consistent quality and stability, especially during upgrades
By automating regression testing, ATF provides confidence that your custom business processes remain intact.
ATF helps to:
- Reduce manual testing
- Catch issues early
- Save time
- Ensure quality after upgrades
What Can ATF Test?
ATF is versatile and can validate a wide range of elements, including:
- Incident creation and lifecycle
- Service Catalog item submissions
- UI Policies
- Client Scripts
- Business Rules
- Flow Designer logic
- Form field behaviors (mandatory, visible, read-only)
- Approval processes
- Server-side logic (e.g., Script Includes, SLA calculations)
- REST APIs and integrations (via inbound/outbound messages or MID Server)
ATF supports client-side (UI) tests, server-side tests, and integration tests.
Main Components of ATF
ATF is built around several key components:
- Test A complete end-to-end scenario that verifies specific functionality. Example: Create an Incident → Set field values → Submit → Validate outcomes.
- Test Step Individual actions or assertions within a test. Examples: Open a form; Set field values, Click Submit, Assert field value. A single test consists of multiple ordered test steps.
- Test Suite A collection of related tests (or even nested suites) for organized execution. Examples: Incident Management Suite, Catalog Suite, SLA Validation Suite.
Additional supporting elements include:
- Test Runner Executes tests and displays real-time results (Passed, Failed, and Skipped), execution time, and error details.
- Test Results Detailed logs with step-by-step status, runtime screenshots (for UI steps), and error messages for debugging.
- Scheduled Test Runs Enables automated execution on a recurring basis (daily, weekly) or tied to events like deployments or pre-upgrade validations.
Types of ATF Tests
ATF supports different testing approaches:
- UI (Client-Side) Tests Simulate real user interactions on forms, lists, and Service Portal. Example: Opening the Incident form, entering a Caller, and submitting.
- Server-Side Tests Validate backend logic without involving the UI. Example: Testing Business Rules, Script Includes, or SLA calculations directly.
- Integration Tests Verify connectivity with external systems. Example: Inbound/outbound REST APIs or MID Server interactions.
Scenario
Verify that an Incident record is created with specified field values.
Steps to Create the Test
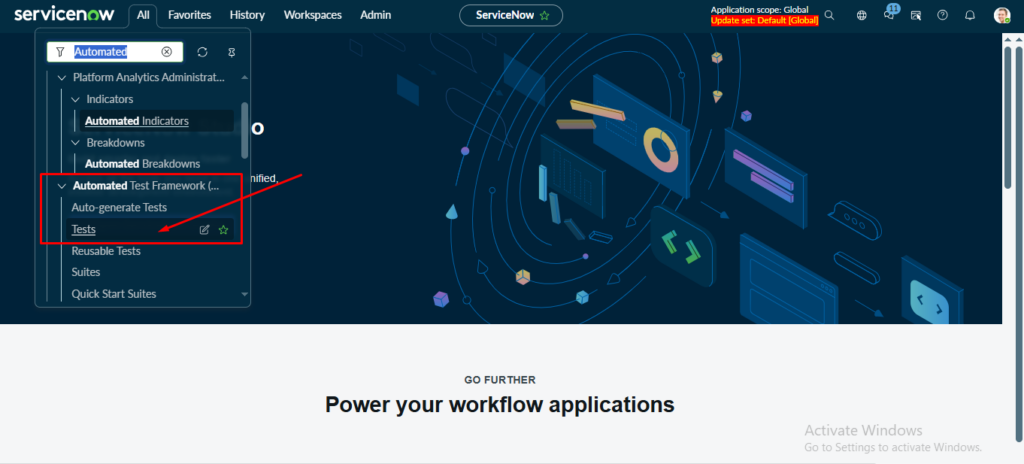
- Navigate to ATF. Go to Automated Test Framework > Tests and click New.
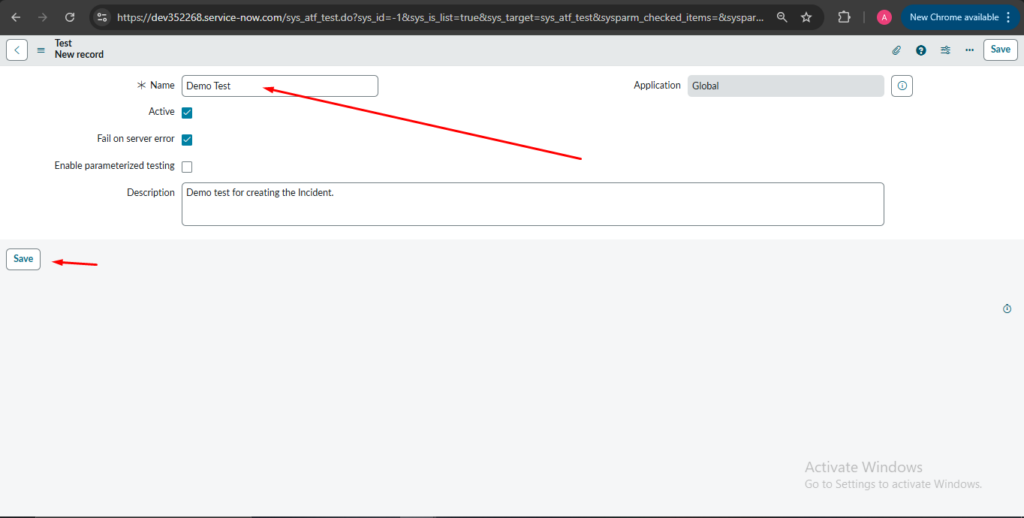
- Configure the Test
- Name: Create Incident – Demo Test
- Table: Incident
Step 1: Open New Incident Form for testing (Temporary)
Test Step: Open a New Form
Table: Incident
Purpose: Opens the incident form
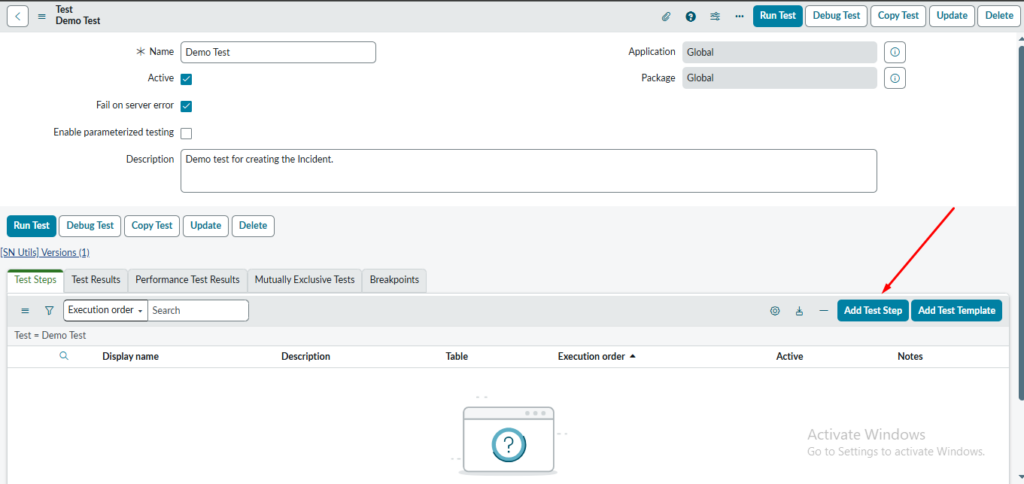
- Add Test Steps
Step 1: Open a New Form
- Test Step Type: Open a New Form
- Table: Incident
- Purpose: This opens the new Incident form, simulating user navigation.
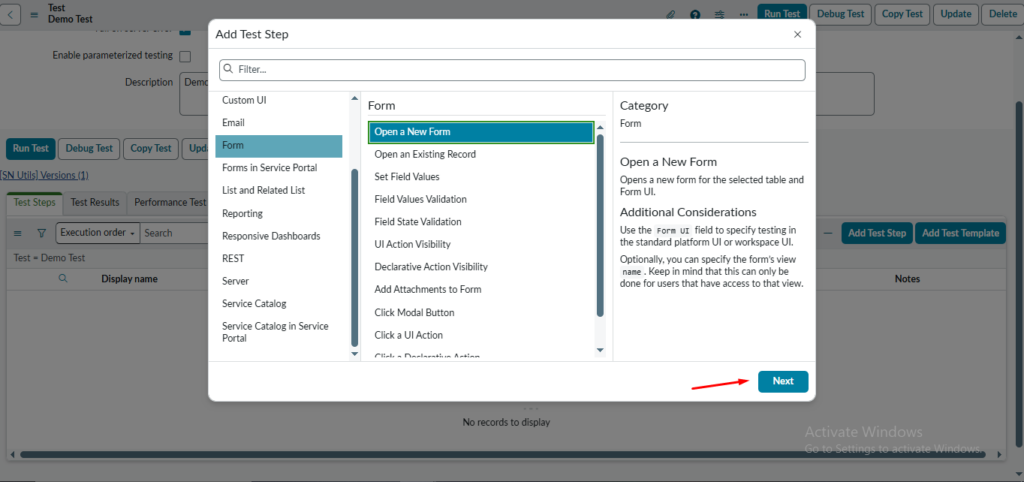
Table – (Select) Incident table in the Table field (Mandatory)
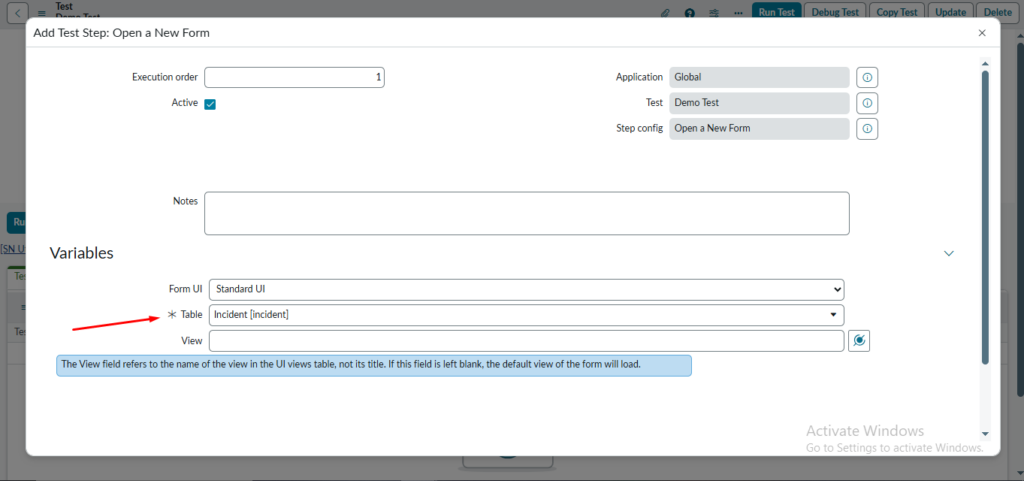
Submit it.
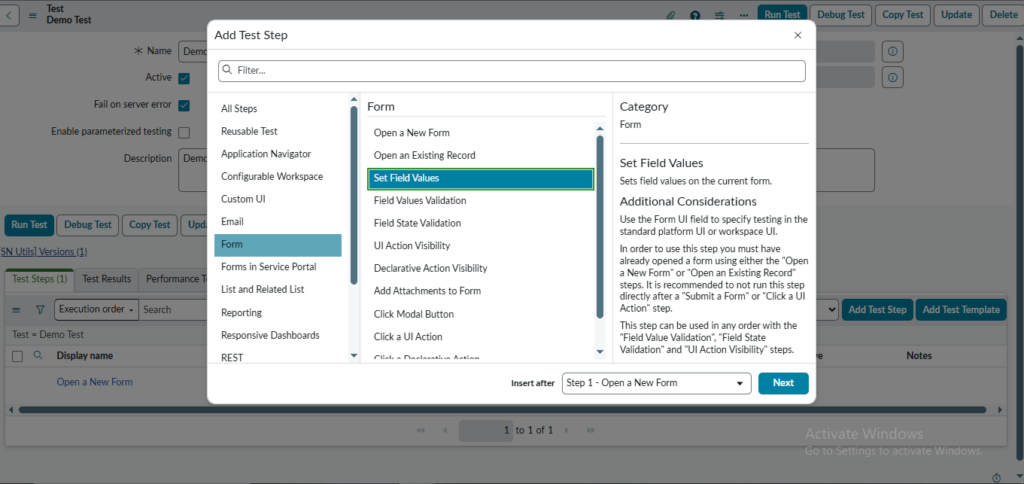
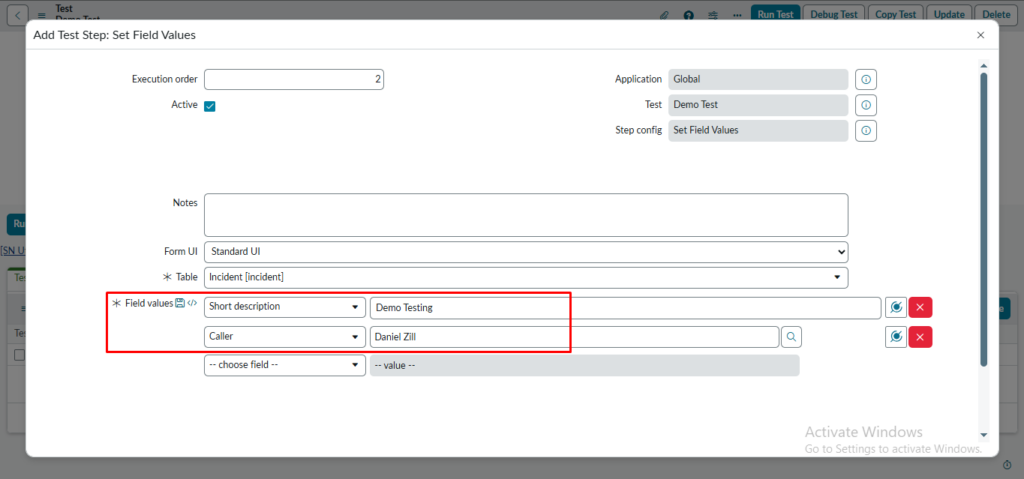
Step 2: Set Field Values
- Test Step Type: Set Field Values
- Examples of fields:
- Short Description: Email issue
- Category: Software
- Purpose: Simulates user input on the form.
Step 3: Submit the Form
- Test Step Type: Submit a Form
- Purpose: Clicks the Submit button to create the record.
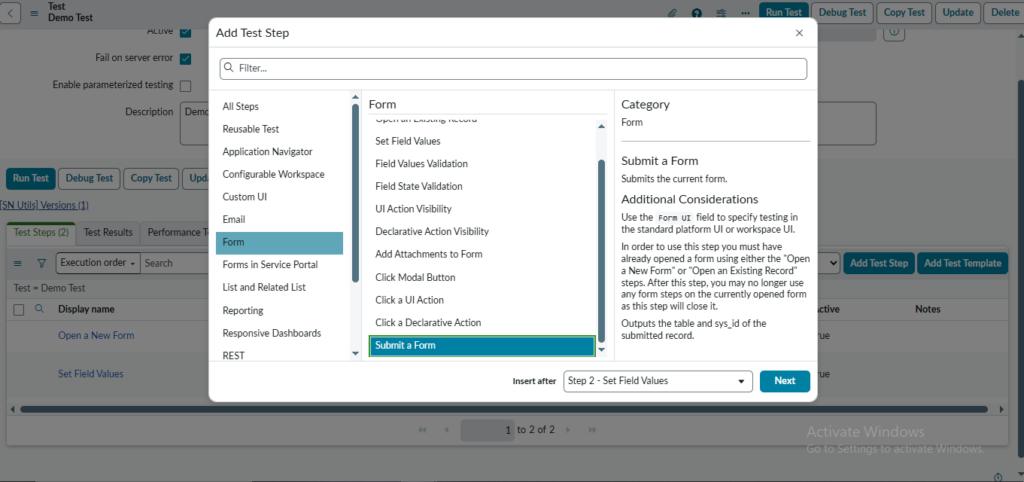
Click on Submit.
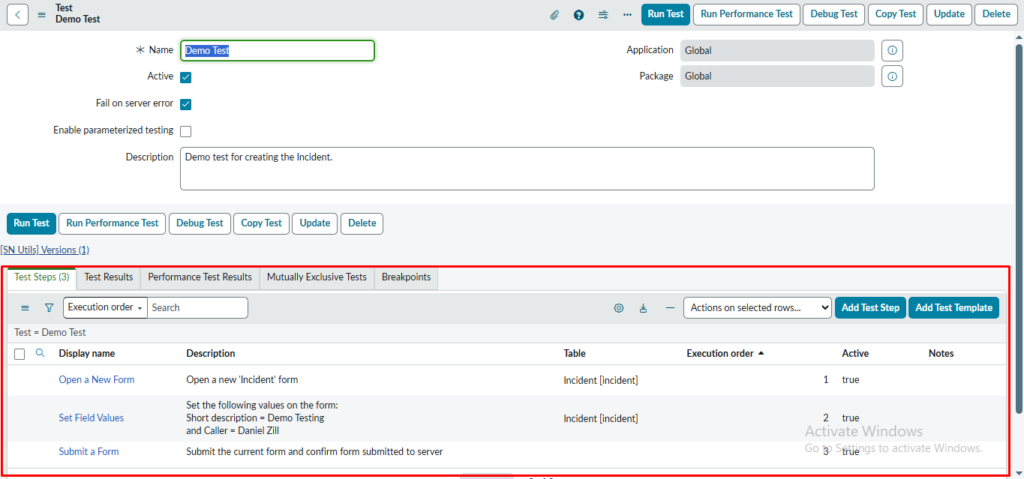
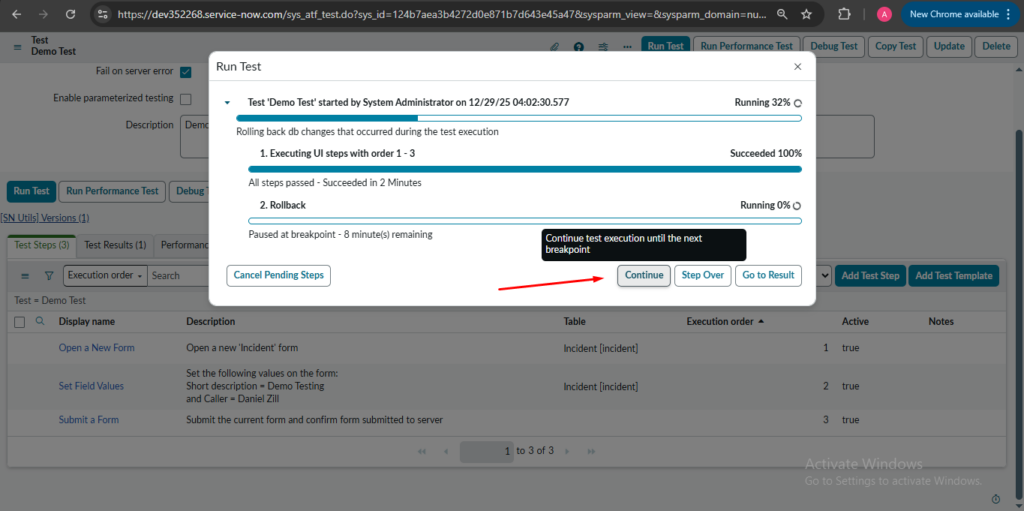
You can see three steps on the test page in red rectangle.
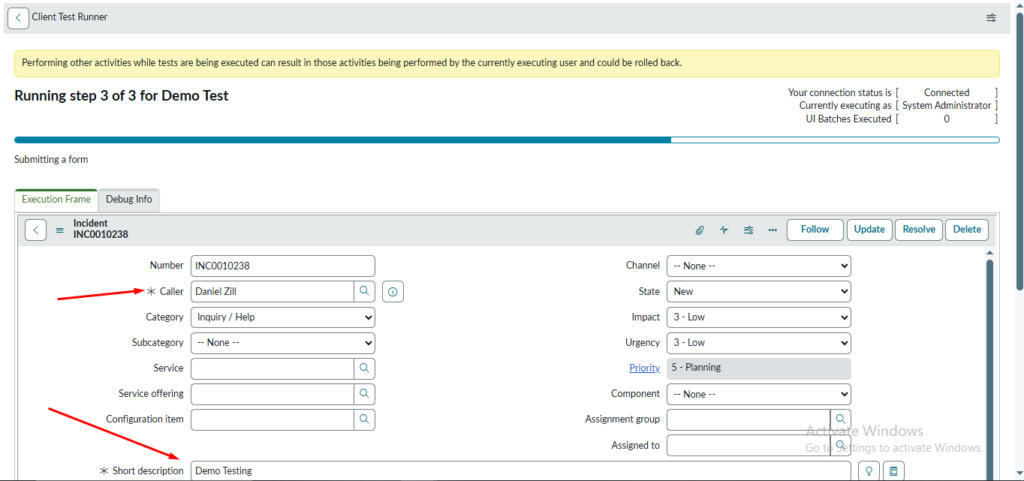
On the Runner page, we can see the Incident form displayed with the specified field values populated.
The Caller field shows the user selected during the test execution, confirming that the correct caller information is captured.
The Short Description field is filled with the provided text, validating that the input data has been passed correctly.
This view helps confirm that the test is creating or opening the Incident record with the expected field values.
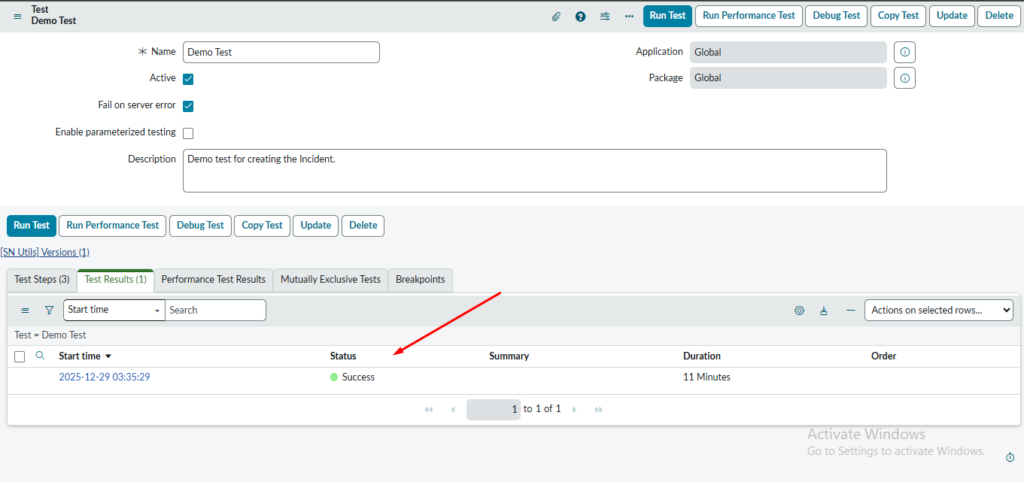
On the Test Case record, the Test Result is shown as Success, which indicates that all the configured test steps were executed without any errors.
Each step met the expected conditions and produced the correct outcome as defined in the test case.
No failures, warnings, or exceptions were encountered during the execution of the test.
This confirms that the related functionality is working as expected under the tested scenario.
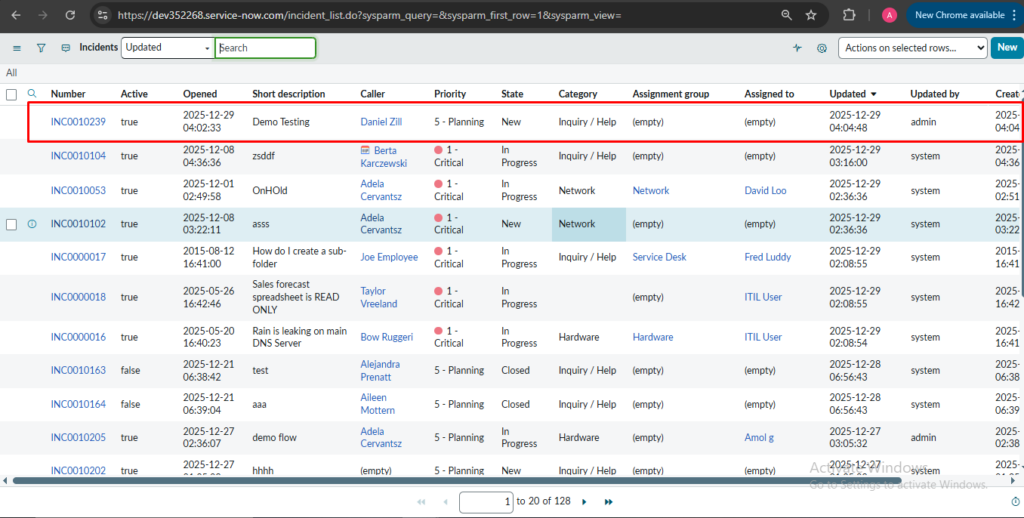
On the Incident list view, we can see that a new Incident record has been successfully created in the system.
The record appears as a new row in the list with key details such as Incident Number, Short Description, Priority, State, and Assigned To.
This listview allows users to quickly verify that the Incident is logged and track its current status.
From here, users can also open the record to view, update, or work on the Incident in detail.
The Incident record may temporarily vanish from the listview for a few minutes while the debug process is running.
During this time, the system is executing background logic such as flows, business rules, or scripts, which can delay the record’s visibility.
Once the debug execution is completed successfully, the Incident record will reappear in the listview.
This behavior is temporary and does not indicate that the Incident has been deleted or lost.
The Automated Test Framework is a powerful, native tool that streamlines testing in ServiceNow, promotes faster releases, and minimizes risks. By investing in ATF early, teams can achieve higher quality, reduced testing overhead, and greater confidence in their customizations.
Start small with critical processes, build reusable steps, and gradually expand your test suites for maximum impact.
Parameterized Testing
Parameterized testing in ServiceNow Automated Test Framework (ATF) allows you to run the same test multiple times with different sets of input data, without duplicating the entire test. This is particularly useful for data-driven testing scenarios, such as validating a process (e.g., incident creation or user access) across various inputs like roles, values, or records.
Why Use Parameterized Testing
- It reduces test maintenance by avoiding duplicate tests for similar scenarios with different data.
- It supports regression testing efficiently.
- Results are reported separately for each data set.
- It integrates with ATF features like rollback, suites, and scheduling.
Enabling Parameterized Testing on Test Record
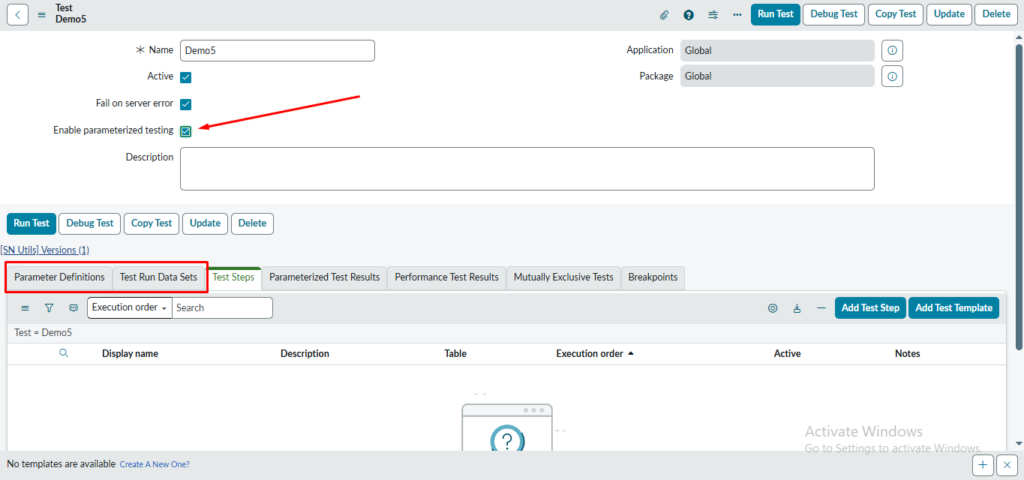
In this screenshot, we can see the ATF Test record configuration.
- The checkbox “Enable parameterized testing” is enabled.
- This option allows the test to accept dynamic input values instead of hardcoded values.
- Once enabled, new related lists such as Parameter Definitions and Test Run Data Sets become available.
- This is the first and mandatory step to use parameterized testing in ATF.
Defining Test Parameters (Parameter Definitions)
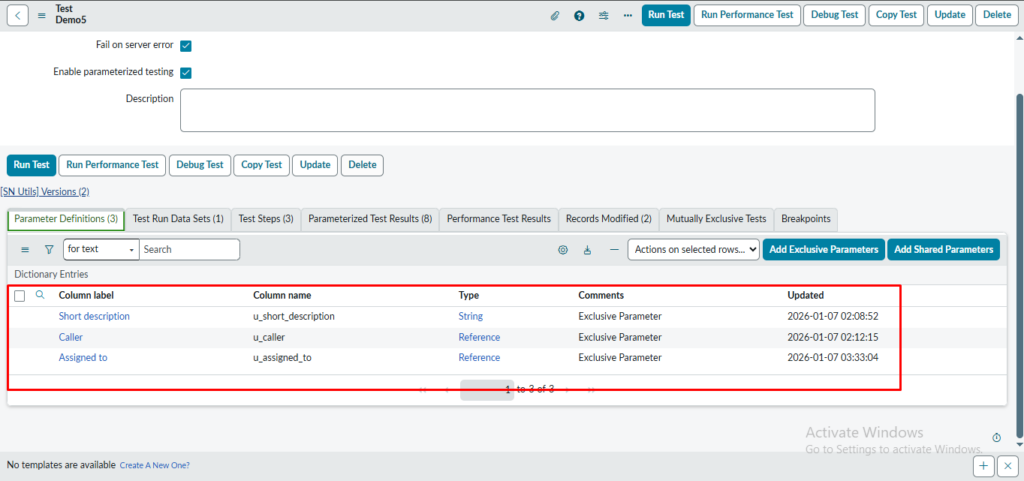
This screenshot shows the Parameter Definitions related list.
- Parameters like Short description , Caller and Assigned to are defined here.
- These parameters act as placeholders for values that will change during test execution.
- Each parameter is mapped to a column name and data type (e.g., String).
- The comment “Exclusive Parameter” indicates that these parameters are specific to this test only.
Using Parameters in Test Step (Record Insert)
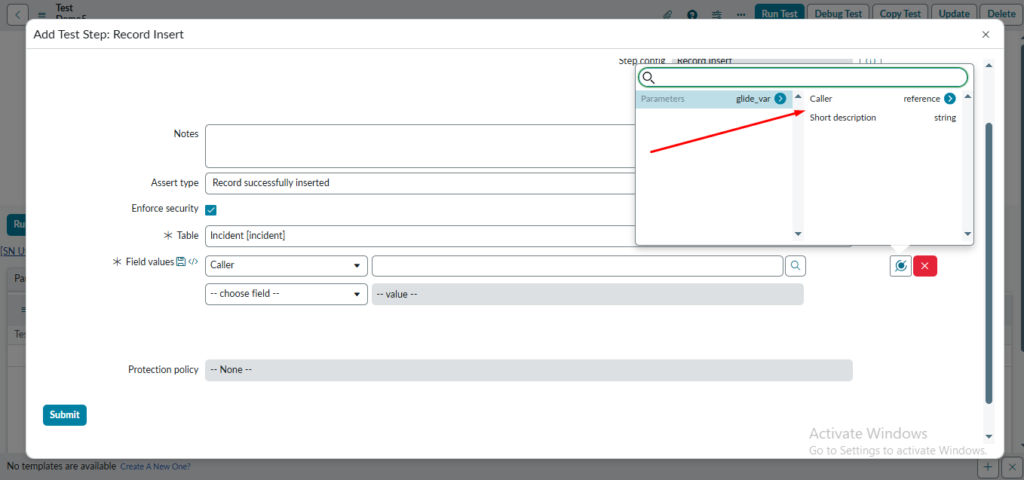
This screenshot shows the Record Insert test step.
- While setting field values, instead of hardcoding data, parameter variables (e.g., glide_var > Caller) are selected.
- These parameters will fetch values from the Test Run Data Sets during execution.
- The test step remains the same, but input values change dynamically for each test run.
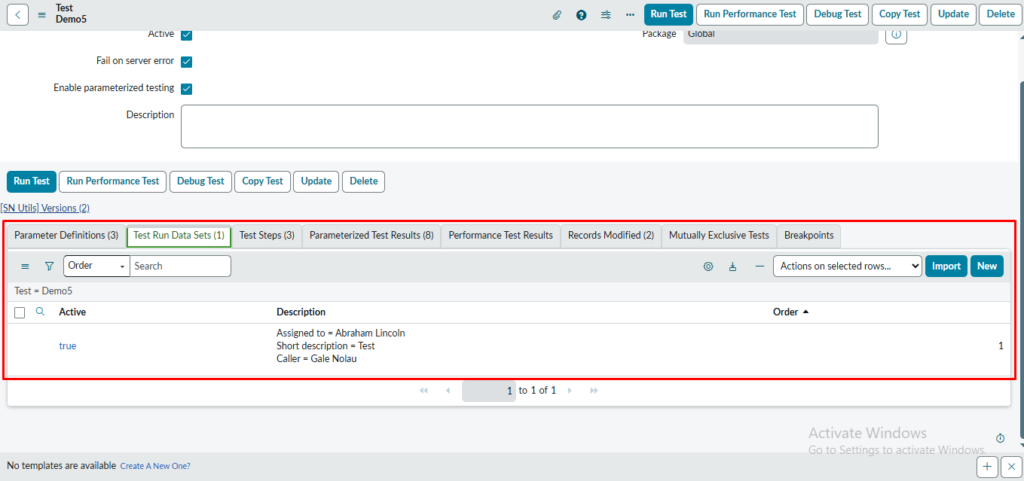
Test Run Data Sets
- This is where actual values for the parameters are stored
- Each row = one test execution
- In your screenshot:
- Caller = Gale Nolau
- Short description = Test
- Assigned to = Abraham Lincoln
- Active = true → this data set will be used during execution
- Order = 1 → execution order when multiple datasets exist
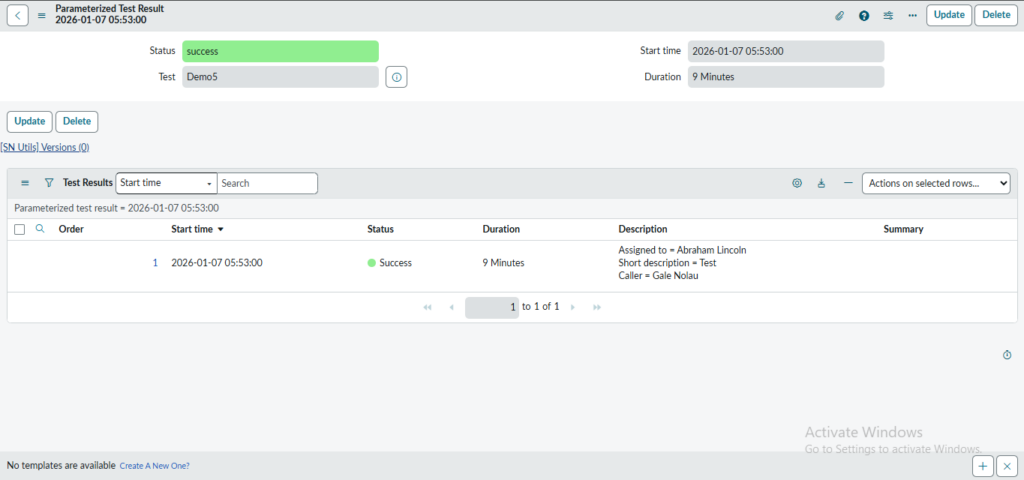
- A single ATF test (Demo5) was executed using parameterized input data.
- The system created a separate test result entry for the data set.
- The test completed successfully, validating that the test logic works correctly with the provided parameters.