
Retroactive Start SLA
Introduction:
In ServiceNow, a retroactive SLA (more precisely, an SLA with Retroactive start enabled) is a configuration option in SLA Definitions that allows a newly attached SLA to “backdate” its start time to an earlier point on the task record (typically the task’s creation time or another specified date/time field), rather than starting the clock from the moment the SLA attaches.
Definition:
Retroactive Start allows an SLA to begin counting from an earlier time in the past, instead of starting only when the SLA conditions are met.
Retroactive Start is a simple but powerful setting for SLAs in tools like ServiceNow. Normally, when an SLA gets attached to a ticket (for example, when the priority changes), the timer starts right at that moment, giving the team the full allowed time from then on.
When you turn on Retroactive Start, the SLA timer goes back in time and starts from when the ticket was originally created. This means all the time that already passed before the SLA was attached counts against the deadline. So, if a lot of time has already gone by, the team has less time left — or the SLA might even breach immediately. It makes the measurement fairer because it treats the issue as if the stricter SLA was always there, reflecting how long the customer has really been waiting.
Example:
- Ticket created on Monday at 10 AM (low priority, 48-hour SLA).
- On Wednesday at 10 AM (48 hours later), priority upgraded to critical (new 8-hour SLA attaches).
Without Retroactive Start:
- New SLA starts Wednesday 10 AM.
- Team has full 8 hours until Wednesday 6 PM.
With Retroactive Start (set to “Created” date):
- The new SLA pretends it started Monday at 10 AM.
- 48 hours have already passed, so it’s overdue immediately! (Or whatever time is left based on the new duration.)
This pushes the team to act faster on escalated issues.
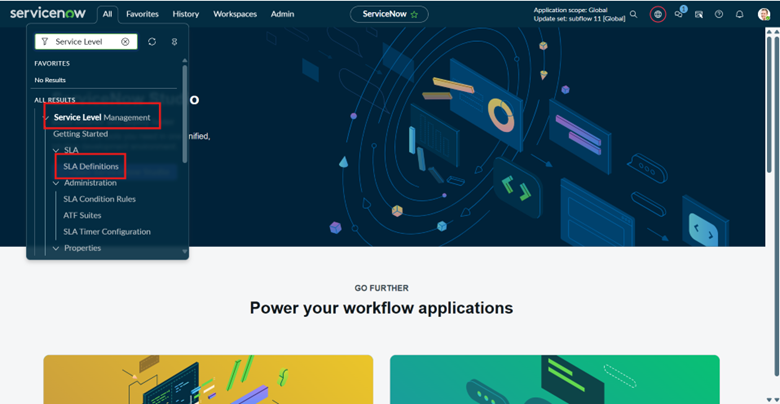
Steps to create retroactive SLA
In Application menu Search Service Level Management, in that find SLA Definitions
- After this we will go to form of the SLA:
This checkbox is located in the Start Condition section.
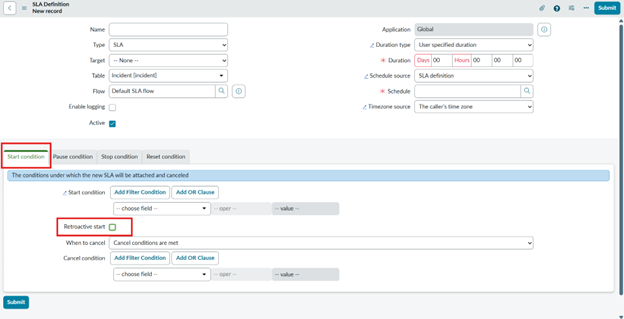
By default, this is unchecked; we have to click this to perform further operations.
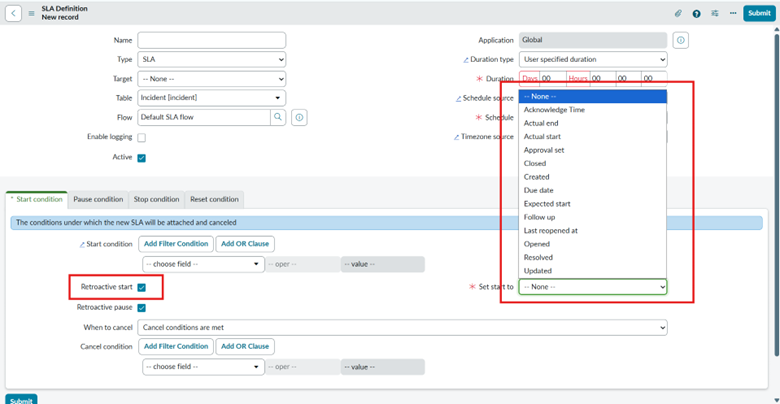
- After Clicking on this checkbox, we will find the ‘Set Start to’ filed which have choices where this Retroactive SLA will start on which field.
Here is the real time example how Retroactive start SLA works:
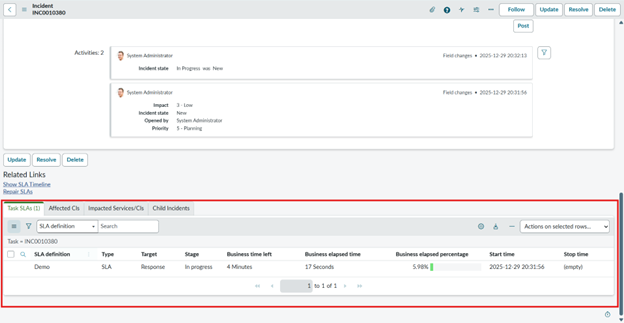
In this, the only normal SLA triggered but when changing condition or where to start the retroactive SLA then only our SLA works.
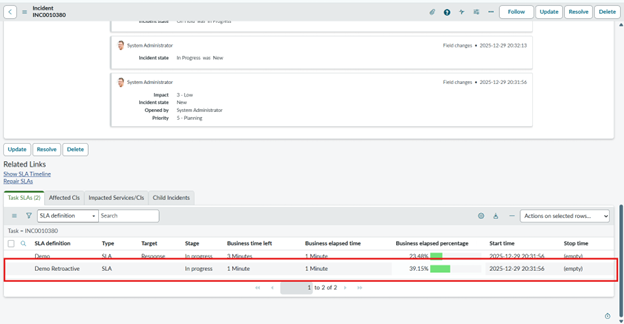
When change in condition here is the retroactive SLA will start and counts the whole time of that incident when it created.
In short, Retroactive SLA makes time tracking fairer by backdating the SLA clock to the ticket’s creation and giving credit for past waiting times. It ensures accurate, realistic deadlines — especially when priorities change — reflecting how long the customer has truly been waiting, without unfair breaches.